Openclaw with gemma-4 vs nemotron-3
Background on Openclaw:
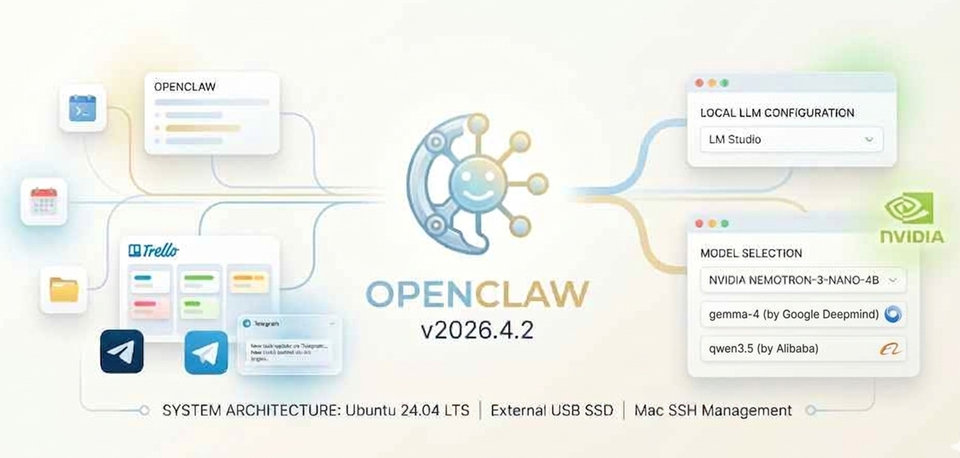
As you may already know, OpenClaw is a free, open-source, self-hosted autonomous AI agent that runs locally on your machine to automate tasks. It can connects to Large Language Models (LLMs) like Claude or GPT to manage files, send emails, browse the web, and operate apps via chat interfaces like WhatsApp or Telegram. So I’m curious to find out what it can do for me!
From my previous blog post, I’ve already setup my server PC (intel i5-11th gen, 32GB RAM, RTX3070 8GB GPU) to run periodic news sentiment analysis using local llm model with searXNG search capabilities through MCP. The sentiment results is then written onto mysql database for further analysis on my webapp.
Openclaw has been all the rage Worldwide these past few months and I really want to try it out for myself! But I’ve been putting it off due to security concern and model cost.
This weekend I have some time to myself, so I will try to tackle both issues and come up with a practical solution.
How I tackle security and cost:
For the security concern, I don’t want Openclaw to mess up my dev PC, so I decided to installed 2nd OS on an external SSD with Dual-boot setup. That way I can completely isolate Openclaw with its own OS, thus able to give “full” OS access to it. Make sure to keep your ‘Windows’ OS SSD unmount to ensure Openclaw doesn’t mess up your personal files! My OS of choice is Ubuntu 24.04.4 LTS for its ease-of-use and stability. This helps to cut off one “leg” of the lethal trifecta, which is ‘Access to Private Data’! If the AI agent combines these three features below, an attacker can easily trick it into accessing your private data and sending it to that attacker!
 The lethal trifecta by Simon Willison
You can read more about The lethal trifecta here: Simon Willison’s Weblog.
The second concern is cost. I want to be able to run Openclaw using local model, and the newly-released nemotron-3-nano-4b from Nvidia is a strong candidate.
Nemotron 3 Nano 4B with 4 billions parameters claims to deliver state-of-the-art accuracy and efficiency for production use on the edge, especially on Instruction following, low VRAM footprint, low latency, excellent tool-use performance, and is highly competitive in hallucination avoidance. Together, these capabilities demonstrate the model’s strong suitability for Openclaw use case, which I’m going to test!
Another newly-release model gemma-4-e4b from Google Deepmind is another strong contender. Gemma 4 models are multimodal, handling text and image input (with audio supported on small models) and generating text output. The e4b stands for Effective 4 Billions parameters, but the model itself is a dense 7.5B which should give it an edge over other 4b models.
Also worth trying is qwen3.5-4b model, with 4 billions parameters and also good at reasoning, complex coding, image understanding, and higher-quality text generation. I will test this as well using the Instruct version.
The added benefit of running your own local model is privacy. My conversations with the model never leave my network. One less thing to worry about!
Project Setup: Openclaw with local llm
Hardware: CPU: intel i5-11th gen RAM: 32GB DDR4 RAM GPU: RTX3070 8GB SSD: WD SN7100
Operating System: Ubuntu 24.04.4 LTS installed on second SSD as Dual-boot (with Windows 11 on main SSD)
Openclaw: version (2026.04.02)
Communication Channel: Telegram
LM Studio: version 0.4.9 AppImage
Models: • nvidia/nemotron-3-nano-4b Q4_K_M (size: 2.84GB) • gemma-4-e4b Q4_K_M (size: 6.8GB) • qwen3.5-4b Q4_K_M (size: 3.38GB)
Results: I can now chat with my openclaw assistant through Telegram with base tools available - It can answer questions about current events, fetch live data, cite sources, setup cron jobs to monitor my websites, all while keeping all my data 100% on my own machine!
The best model of the three, in my opinion, is gemma-4-e4b from Google DeepMind. It’s able to follow prompt instruction, use available tools, perform deep research with browsers (I used Brave Browser), setup and run cron jobs, etc. Truly exceeds my expectation! Nvidia nemotron and Alibaba qwen did reasonably okay at simple task, like setting up simple cron job, but struggle with more complex task requiring various steps to achieve the goal.
 Openclaw setting up cron job through Telegram
Step-by-step instructions:
Step 1. System Preparation
First I need to setup Ubuntu as dual-boot on my Windows 11 PC to isolate my Openclaw environment. I download Ubuntu directly from its website: https://ubuntu.com/download/desktop.
 Download Ubuntu desktop
The setup is quite straightforward as per the website’s instruction.
- Download the ISO image
- Create a bootable USB flash drive with an image writer (I use Rufus on Windows 11)
- Boot the laptop or PC from the USB flash drive
I attached my 2nd SSD to my PC’s USB port, then restarted the system. For my PC, pressing F12 key will invoke a bootloader. I chose the USB flash drive, which will start up Ubuntu installer.
I ran into problem with graphics driver compatibility issue during installation, so I had to reboot into Safe Graphics Mode to continue. Then, when presented with an option where to install Ubuntu, make sure to choose the 2nd SSD!
The OS installation will take a while. Once it’s done, proceed to install the following:
- lmstudio AppImage (from its website: https://lmstudio.ai
- Telegram Desktop (not strictly needed, but nice to have to communicate with your openclaw)
 Download lmstudio AppImage. Need to set permission to run file as program.
Once lmstudio is downloaded, to run an AppImage in Ubuntu, make the file executable by right-clicking it, selecting Properties > Permissions, and checking “Allow executing file as program”. Then you can right-click the file and run it.
In lmstudio, turn on developer mode, proceed to download the model and turn on local server mode. For my use case, I downloaded nvidia/nemotron-3-nano-4b Q4_K_M (size: 2.84), gemma-4-e4b Q4_K_M (size: 6.8GB) and qwen3.5-4b Q4_K_M (size: 3.38GB). All models fit nicely on my 8GB VRAM with enough room for context and other apps. You can try other model variants to see which one suits you better. Set the model context as large as your memory allow. For initial setup, I set my contextWindow to 32000 and maxToken to 8192. Optionally you can install and run btop (my personal favorite) to monitor your cpu/gpu/ram/vram usage while you tweak the settings.
# Install btop
sudo apt update
sudo apt install btop

# Run btop to monitor resources usage
btop
Step 2. Install Dependencies
OpenClaw is built on TypeScript and requires Node.js 22 or higher to run.
-
Open Terminal on Ubuntu
-
Update your system:
sudo apt update && sudo apt upgrade -y- Install Node.js 22:
curl -fsSL https://deb.nodesource.com/setup_22.x | sudo -E bash -
sudo apt install -y nodejs- Verify version: node -v should show v22.x.x.
Step 3. Install and setup Openclaw
- Install OpenClaw
You can install the OpenClaw CLI globally using npm.
sudo npm install -g openclaw@latest- Onboarding & Configuration
Once installed, you need to run the setup wizard to connect AI model and your messaging apps (Telegram in my case).
Start the Wizard:
openclaw onboard --install-daemon- Select the local model: Custom
- Gateway Security: When asked for the bind address, choose Localhost (127.0.0.1) for safety.
- Install Daemon: Select “Yes” to let OpenClaw run as a background service (systemd) so it’s always ready when you boot the SSD.
Step 4: Modify config file
You need to edit openclaw.json with Nano or other text editor to add your local model. The openclaw.json file is located in your hidden home folder. Because it’s a strict JSON file, one missing comma can stop the bot from starting.
- Open the file:
nano ~/.openclaw/openclaw.json- Add your Model Info: Scroll down to the models and agents sections. You want to ensure your NVIDIA-Nemotron is set as the primary model. Your config should look similar to this, though not in exact order, but be prepared to adjust accordingly.:
{
  "agents": {
    "defaults": {
      "workspace": "/home/user/.openclaw/workspace",
      "model": {
        "primary": "custom-127-0-0-1-1234/nvidia/nemotron-3-nano-4b"
      },
      "models": {
        "custom-127-0-0-1-1234/nvidia/nemotron-3-nano-4b": {
          "alias": "nvidia/nemotron-3-nano-4b"
        }
      }
    }
  },
  "models": {
    "mode": "merge",
    "provider": {
      "custom-127-0-0-1-1234": {
        "baseUrl": "http://127.0.0.1:/v1",
        "api": "openai-compatible",
        "apiKey": "lm-studio",
        "models": [
          {
            "id": "nvidia/nemotron-3-nano-4b",
            "name": "nvidia/nemotron-3-nano-4b (Custom Provider)",
            "contextWindow": 32000,
            "maxTokens": 8192,
            "input": [
              "text"
            ],
            "cost": {
              "input": 0,
              "output": 0,
              "cacheRead": 0,
              "cacheWrite": 0,
            },
            "reasoning": false
          }
        ]
      }
    }
  }
}
Increase contextWindow and maxOutput to your likings, and monitor system resouces. Make sure you check all the comma and brackets! Openclaw will throw error if you miss the syntax!
- Save and Exit:
- Press Ctrl + O (Write Out) and then Enter to save.
- Press Ctrl + X to exit Nano.
- Validate your work: Before restarting, let OpenClaw check for typos:
openclaw doctorIf it says “Configuration is valid,” you are good to go! If something needs fixing, run:
openclaw doctor --fix- Connecting Your Openclaw
Web Dashboard: After onboarding, OpenClaw will provide a unique tokenized link. Save this! It’s how you access the UI.
Messaging: Connect a Telegram bot (via @BotFather) so you can text your AI agent from mobile phone. Use command ‘/newbot’ in @BotFather on Telegram to setup your Telegram bot.
Step 5: Testing
Once everything is ready, start openclaw:
# To start openclaw
openclaw gateway start

# To stop openclaw
openclaw gateway stop

# To restart openclaw after changing openclaw.json config
openclaw gateway restart
Troubleshooting problems:
During my Openclaw setup I ran into a few problems. This is how I solved it through trial-and-error!
- The “Dependency Loop” The Telegram extension would “fail to start,” putting the OpenClaw gateway into an infinite restart loop. The root cause was a missing internal package (@grammyjs/runner). On Ubuntu, the global installer sometimes misses these sub-dependencies, causing the bot to crash and attempt an infinite “Restart X/10” loop.
The Fix: You have to “inject” the missing libraries directly into the OpenClaw core directory.
But first you need to install git as NPM is trying to install a plugin dependency that comes from a Git repository, not from the NPM registry. Without Git, NPM cannot fetch it → OpenClaw plugin runtime deps fail.
sudo apt update
sudo apt install git -y

# Verify version
git --version
Now inject the missing libraries directly into the OpenClaw core directory.
# Navigate to the root of the installation
cd /usr/lib/node_modules/openclaw

# Manually install the Telegram engine components
sudo npm install grammy @grammyjs/runner @grammyjs/transformer-throttler --save-prod- Other dependencies:
You may run into many other dependencies like:
- Error: Cannot find module ‘@buape/carbon’
- Error: Cannot find module ‘@larksuiteoapi/node-sdk’
- Error: Cannot find module ‘@slack/web-api’
- Error: Cannot find module ‘grammy’
Just keep installing the dependencies until you can run openclaw doctor.
# Manually install the Telegram engine components
sudo npm install -g '@buape/carbon'
sudo npm install -g '@larksuiteoapi/node-sdk'
sudo npm install -g '@slack/web-api'
sudo npm install -g grammy

# Test with openclaw doctor
openclaw doctor- Solving the “Port” Conflict If your bot crashes, it often leaves a “zombie” process holding onto port 8787. This prevents the bot from restarting even after you fix the code.
The Fix: Force-kill any process squatting on that port:
sudo fuser -k 8787/tcp- Forcing “Long Polling” Mode By default, OpenClaw 2026.4.2 tries to use Webhooks, which require complex SSL certificates. For a home setup, Long Polling is much more stable.
The Fix: Use the CLI to strip the webhook settings and enable polling:
openclaw config unset channels.telegram.webhookUrl
openclaw config set channels.telegram.polling.enabled true- Pairing & Policy Lock Even after the bot was “online,” it wouldn’t respond to prompts. It would only send a pairing code. This is a security feature to prevent strangers from using your local NVIDIA-Nemotron model.
The Fix: You need to add your Telegram User ID to openclaw.json and set config to ‘pairing’. Then use the pairing command to authorize your specific Telegram account and then locked the door behind us by switching the policy:
# Authorize the session
openclaw pairing approve telegram [YOUR_PAIRING_CODE]

# Set the policy so only YOU can talk to it
openclaw config set channels.telegram.dmPolicy "allowlist"
Tips and Tricks:
- Giving the Bot “Tools” & “Memory”:
Once the connection was stable, I unlocked the bot’s full potential by modifying the tools.profile.
- Tool Access: Set tools.profile to “full”. This allows the bot to run bash commands, read/write files, and search the web.
- Persistent Memory: We set up MEMORY.md and SOUL.md. These files act as the bot’s “long-term storage,” allowing it to remember my preferences and personality even after a system reboot.
- Keeping the server awake: Ubuntu loves to save power, but a sleeping PC means a dead bot. I used gsettings to ensure the Predator stays on 24/7:
gsettings set org.gnome.settings-daemon.plugins.power sleep-inactive-ac-timeout 0
gsettings set org.gnome.desktop.session idle-delay 0
Or you can go into Ubuntu settings and adjust those as well.
- Monitoring logs:
You can monitor logs of OpenClaw admin. Use the command below to see how the AI model actually “think” and execute bash commands in real-time.
# Monitor openclaw logs
openclaw logs --follow
When you are running the follow command, keep an eye out for these specific strings:
- [INFO] [gateway] Listening on 18789: Your server is officially up.
- [WARN] [model-api] Latency > 5000ms: Your GPU might be thermal throttling or doing a background update.
- [ERROR] [skill-executor] Permission Denied: You tried to run a tool (like exec) but your tools.profile isn’t set to “full”.
- Giving full access privelege to your openclaw:
This one requires changing your config in openclaw.json.
"exec": {
  "security": "full",
  "ask": "off"
}
Perform openclaw gateway restart for it to take effect. But make sure you know what you’re doing!
- Monitor overview and status of your openclaw:
Once your openclaw is running, you can visit Openclaw Overview to see its status and config.
Final Thoughts
Current Status of my Openclaw setup: Online and 100% local. I can now text my server PC from anywhere in the world using Telegram, ask it to analyze files/image, research the web, monitor my production webapp — all powered by an local llm model sitting right on my desk!
If I need to make any changes to my Openclaw setup, I can send command from my Telegram like ‘/start’, ‘/stop’ to start/stop Openclaw, ‘/status’ to check its current status. Use ‘/help’ to show all available commands.
For more technical changes, like installing more packages or changing config in openclaw.json, I like to use SSH from my Macbook to Ubuntu. Below is a quick guide on how I setup the SSH bridge.
MacOS-to-Ubuntu SSH Setup
- Installing openssh-server on Ubuntu: First, we had to tell the PC to listen for incoming connections by installing the SSH server.
sudo apt update
sudo apt install openssh-server

# Allow ssh on Ubuntu Firewall
sudo ufw allow ssh
sudo ufw reload

# Verify status with this command
sudo systemctl status ssh

# Ensure ssh starts automatically on every reboot
sudo systemctl enable --now ssh
- Finding the server’s IP Address (Local): To connect from your MacBook, you needed the local IP address of the Ubuntu machine.
hostname -I• Result: Usually something like 192.168.1.XX. Or you can ask openclaw thru Telegram to get system IP for you!
It is also a good idea to set fixed IP for the server in your router or network switch to avoid the IP guess work.
- generate SSH Key on your Mac:
To stop typing your password every time, let’s setup SSH Keys. • On your Mac: ssh-keygen -t ed25519 • Send it to Ubuntu: ssh-copy-id user@192.168.1.XX
- Connect from MacOS: On your Mac, open built-in terminal and run the command.
ssh user@192.168.1.XXWhat’s Next
I’m setting up my AI agent with access to my company’s Trello workspace through Trello developer API. I will let you know how it helps manage our projects and boards soon!
- Check back for more later, so stay-tuned!
🔗 Connect
I’m building Prevalis Strategies as a technical + strategic consulting venture. Follow the journey, learn with me, or drop suggestions and questions!
Domain: https://prevalis.ai
Email: [info@prevalis.ai]
Built & maintained by: prevalis.ai ✨